


5 Certified Duct Testing Steps Contractors Must Master

Last Updated: October 26, 2026
Quick Summary
Certified duct testing measures how much conditioned air escapes ductwork under pressure and compares it to applicable code thresholds. It is a compliance requirement for new construction and major renovations, providing documentation that your ductwork meets code before permit closeout.
Certified duct testing typically takes 2-4 hours total, including setup, pressurization, problem identification, and documentation.
Ductwork must be complete and sealed with mastic or approved tape before testing begins.
Leakage is measured in CFM loss and compared using either a percentage of system airflow or CFM per square foot formula.
Test pressure is typically maintained at 25 pascals while measurements stabilize and are recorded.
Table of Contents
Why Certified Duct Testing Matters for Contractors
Certified duct testing is essential for HVAC work in new construction or major renovations. Codes require proof that ductwork meets leakage standards before permit closeout.
Inspectors won't sign off without documentation that your ducts perform as designed. Certified duct testing is no longer optional, it's a compliance requirement.
At Central Duct Testing, we work with contractors who know cutting corners creates bigger problems later. A leaking system wastes energy and delivers inconsistent comfort, clients notice, call back, and leave bad reviews.
Certified duct testing provides the documentation proving your work meets code, and identifies problems before the inspector arrives.
Understanding Duct Leakage Testing Requirements
Duct leakage testing requirements vary by jurisdiction, but the core principle is consistent: ductwork must perform within acceptable limits.
**1.
2. The mechanical code and local amendments. The International Mechanical Code (IMC) and local amendments can add sealing, testing, and documentation requirements beyond the energy code.
3. The program or utility requirement. If the project is tied to an energy-efficiency program, utility rebate, or above-code certification, the program's standard may be stricter than the code minimum.
Here is how those layers translate into practice:
Residential new construction is typically tested after the duct system is complete and sealed but before ceilings or walls close off access. Many jurisdictions require the test before drywall; some require a second verification after finish-out.
Commercial work often falls under a different chapter of the mechanical code and may require testing of the entire system or of representative sections, depending on system size and the local amendment.
Retrofit and replacement work may be exempt, may require testing only when the duct system is substantially altered, or may require a post-work verification, the scope of the exemption is set locally, not nationally.
Additions and alterations frequently trigger testing when the altered portion exceeds a threshold defined in the adopted code or local policy.
Watch Out Do not assume the threshold you used on the last project applies to the next one. Code edition, local amendments, and program requirements can all change the pass/fail line between two jobs in the same metro area.
The certified duct testing procedure is standardized: measure how much conditioned air escapes under pressure and compare it to the applicable threshold. Pass or fail is determined by the numbers, once you've confirmed which standard the authority having jurisdiction will apply.
A practical habit: before you bid or schedule a test, pull the permit record, confirm the adopted code edition, and ask the building department whether it publishes a duct leakage test protocol.
How Long Does Duct Leakage Testing Take
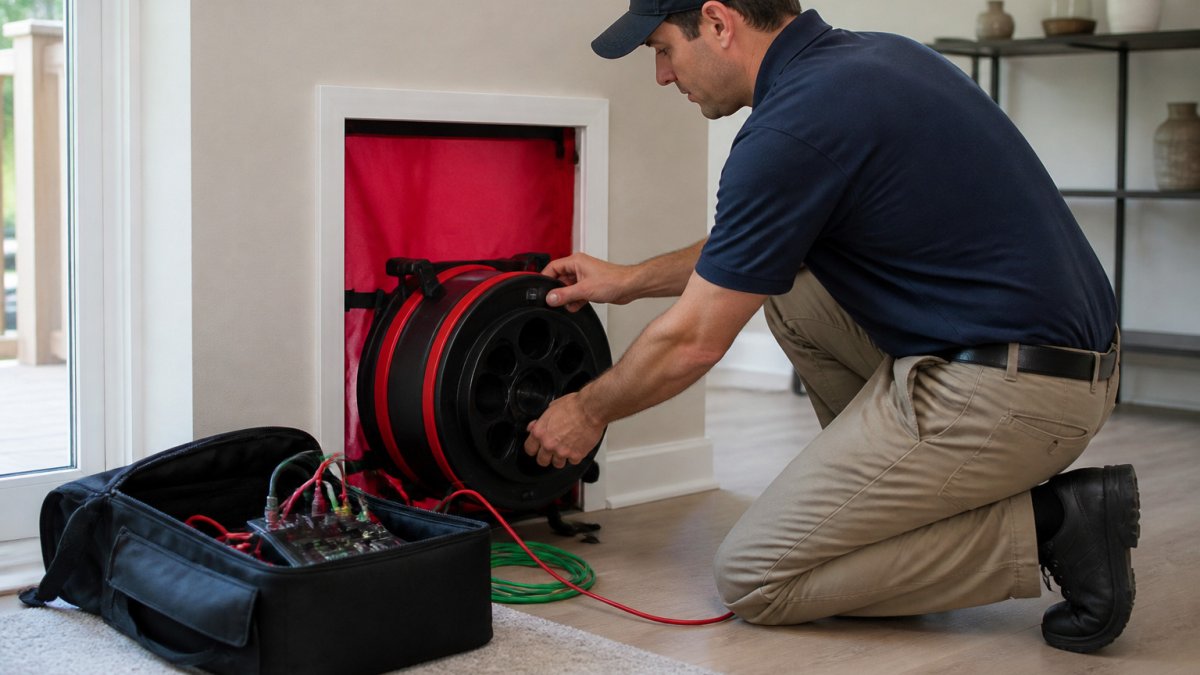
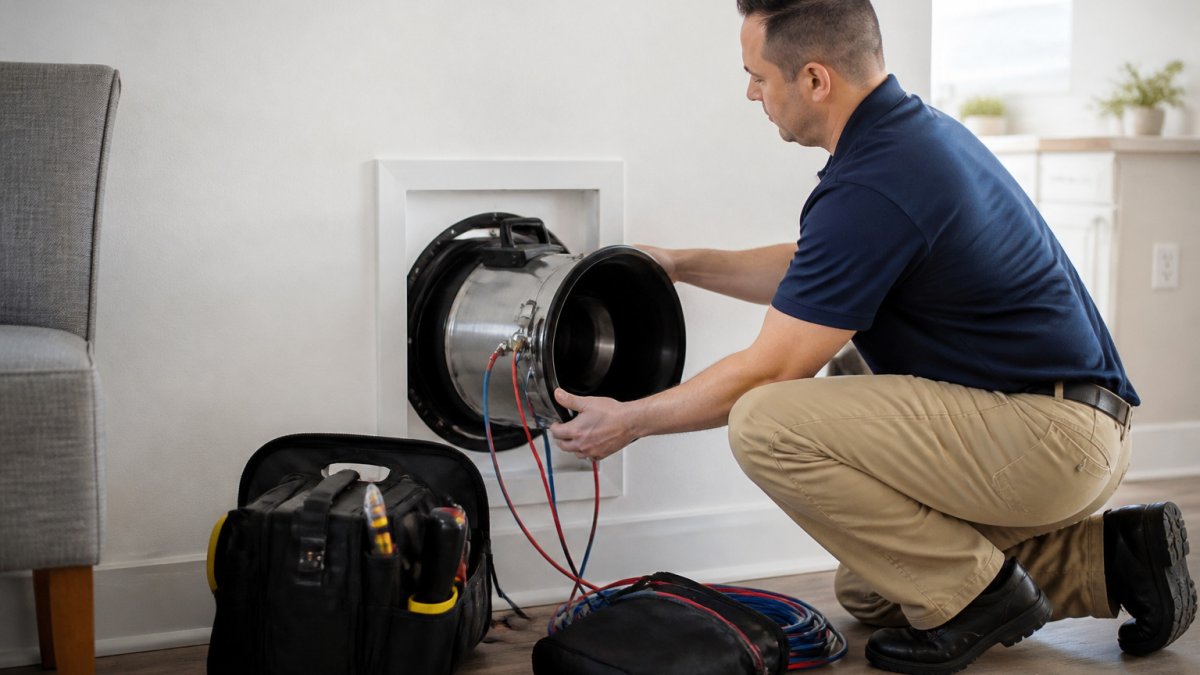
Setup and equipment connection usually take 30-45 minutes: sealing grilles and registers, connecting the blower door, placing pressure gauges, and calibrating instruments.
The pressurization test itself runs 15-30 minutes: pressurize the duct system to standard test pressure and measure leakage.
If leakage exceeds code limits, you'll identify problem areas, seal them, and retest, a cycle that can add 1-2 hours.
Documentation adds 30-60 minutes: the certified tester records measurements, photographs conditions, and generates a formal report for permit closeout.
Weather affects timing too: high winds or extreme temperatures can make accurate pressure readings difficult, so test on calm days.
Certified duct testing typically takes 2-4 hours total, with time distributed across several distinct phases.
Phase | Duration | What Happens |
Setup and equipment connection | 30-45 minutes | Seal grilles, connect blower door, place gauges, calibrate |
Pressurization test | 15-30 minutes | Pressurize system and measure leakage |
Problem identification and sealing | 1-2 hours | Identify leaks, seal them, and retest if needed |
Documentation and reporting | 30-60 minutes | Record measurements, photograph, generate report |
Preparing Your Duct Leakage Test: Essential Checklist
Preparation determines whether certified duct testing runs smoothly. Before the tester arrives:
Ductwork must be complete and ready:
All duct connections are sealed with mastic or approved tape
No open holes or disconnected sections remain
Ductwork is properly supported and secured
Access points are clear for equipment placement
The HVAC system should be accessible:
Furnace or air handler is accessible for equipment setup
Ductwork in attic, crawlspace, or walls is reachable
Return air plenum can be sealed for testing
Supply registers and return grilles are accessible
Clear the test area:
Remove obstacles around furnace or air handler
Ensure adequate space for blower door setup
Clear pathways through attic or crawlspace
Verify utilities won't interfere with equipment placement
Coordinate with other trades:
Drywall is complete or scheduled accordingly
Insulation work is finished before testing
HVAC rough-in is complete and ready
No active construction work during testing
Have documentation ready:
Ductwork plans or system layout
Building permit information
Any previous testing records
Contact information for follow-up communication
The certified duct testing team will guide you through jurisdiction-specific requirements. Ask questions beforehand to prevent surprises.
The Certified Duct Testing Procedure and Pressurization
The certified duct testing procedure follows a precise protocol. The tester seals all supply registers and return air openings, isolating the ductwork so it can be pressurized as a closed system.

A blower door or duct tester connects to the return air plenum and pressurizes the entire duct system to a standard test pressure, typically 25 pascals. Consistent Comfort and Optimal Airflow for HVAC Consultants explains how proper ductwork design supports the airflow and system performance that testing verifies.
Pressurization makes leakage measurable: air escaping through small holes, loose connections, or poor seals is quantified in cubic feet per minute (CFM), that CFM loss is your leakage rate.
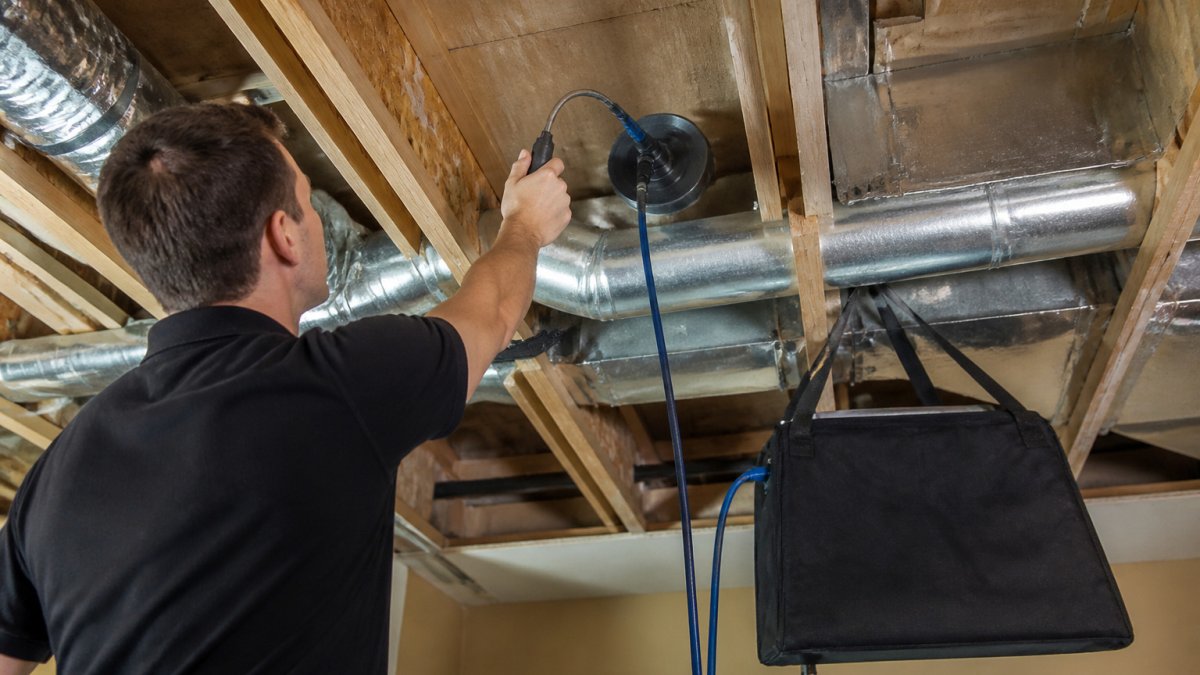
Thermal imaging can reveal problem areas as temperature differences on the ductwork surface, helping pinpoint where air escapes.
Test pressure is maintained for several minutes while measurements stabilize, then the tester records CFM loss at standard pressure, your official leakage measurement.
If results pass code thresholds, testing is complete. If leakage exceeds limits, the tester identifies problem areas; you seal them and retest to verify improvement. What Happens After Duct Testing: A Complete Guide walks you through interpreting your results and the next steps after testing concludes.
Pressurization is non-destructive, it doesn't damage ductwork or equipment, just measures performance under controlled conditions.
Interpreting Duct Testing Results and CFM Loss
Your certified duct testing report shows CFM loss at standard pressure, how much conditioned air escapes your ductwork.
The two formulas you will see. Most jurisdictions express duct leakage in one of two ways, and confusing them is a common source of failed inspections:
Leakage as a percentage of system airflow. Leakage CFM divided by total system airflow CFM, expressed as a percentage. A 500 CFM loss on a 5,000 CFM system is 10% leakage. Some codes set the limit as a percentage of design airflow.
Leakage per unit of conditioned floor area. Leakage CFM divided by the conditioned floor area of the dwelling or space, expressed in CFM per square foot. This is common in residential energy code provisions and is why two homes with identical duct systems can pass or fail depending on square footage.
Confirm which formula your jurisdiction uses before you interpret a single number. A result that looks like a pass under one formula can be a fail under the other.
Locating the leaks. Once you know the leakage number, the next job is finding where it comes from. Common problem areas include:
Duct joints and connections, especially where sections were assembled on site
Longitudinal seams and factory joints that were not sealed
Penetrations through framing, walls, and floor assemblies
Transitions from the plenum to the main trunk
Damper, register, and grille installations
Return air chases and panned joist returns
Documenting corrective work. When a test fails, the retest is only as good as the documentation of what changed.
Retesting. After sealing, retest under the same conditions as the original test, same test pressure, same configuration, same sealing of registers and openings.
Pro Tip Build a simple leak log for every project: location, photo, repair method, and retest result. It speeds up the retest, supports the final report, and gives you a defensible record if a client or inspector questions the work later.
Most failures aren't catastrophic, they're fixable with mastic, approved foil tape, and caulk at the right locations. Contractors who handle failures well treat the first test as a diagnostic tool rather than a verdict, and document the correction so the retest closes the loop.
Creating Your Duct Testing Report for Permit Closeout
Your certified duct testing report is the official documentation that permits your project to move forward.
The report must include:
Tester credentials and certification information
Test date and location details
Ductwork system description and configuration
Test pressure and methodology used
CFM loss measurement at standard pressure
Pass/fail determination against code threshold
Photographs showing test setup and conditions
Signature and seal from certified professional
This isn't just paperwork. It's your proof that the system meets code. Inspectors need it to close out permits.
The report should be clear and professional, inspectors review dozens, and a well-organized one keeps your project moving.
Digital copies work fine, but have hard copies available too. Some jurisdictions still require paper documentation for their files.
Detailed guidance on duct testing reports and permit closeout procedures provides additional context for navigating the closeout process successfully.
Store copies in your project file. If questions arise later, you have documentation proving the system passed testing. This protects you and your client.
Getting Started with Your Next Certified Duct Test
Certified duct testing for contractors isn't complicated once you understand the process. The key is preparation, accurate measurement, and proper documentation.
Start by confirming your local code requirements. Different jurisdictions have different thresholds. Know what you're testing against before the tester arrives.
Next, ensure your ductwork is complete and ready. Unfinished work or poor connections will show up in testing.
Schedule your certified duct testing when the system is ready but before final inspections.
Work with professionals who understand your local codes.
The goal is straightforward: prove your ductwork performs as designed. Certified duct testing provides that proof.
Certified duct testing isn't optional anymore, it's a compliance requirement that separates professionals from those still catching up.
Frequently Asked Questions
What is the difference between certified duct testing and standard duct inspection?
Certified duct testing uses pressurization equipment and a blower door to measure actual air leakage in CFM (cubic feet per minute), producing a quantifiable result and test report. Standard inspection is visual only and does not measure leakage rates. Building codes and Title 24 compliance require certified duct leakage testing with documented results, not visual inspection alone. A qualified tester uses calibrated pressure gauges and test equipment to establish pass/fail criteria against code thresholds.
How long does duct leakage testing take for a residential project?
Most residential duct leakage testing takes 1 to 2 hours, depending on system size and ductwork complexity. Setup includes sealing registers and preparing the system for pressurization, the test itself typically runs 15 to 30 minutes, and final documentation adds time. Larger homes or commercial systems may require 2 to 3 hours. Your contractor or certified tester should provide a time estimate before work begins so you can schedule accordingly and avoid project delays.
What happens if my duct system fails the leakage test?
A failed test means your air leakage exceeds the allowable CFM loss threshold set by code. The test report identifies problem areas, and your HVAC contractor can seal leaks using mastic, tape, or other approved methods. After repairs, you schedule a retest to verify compliance. Many contractors handle both testing and sealing in-house; others coordinate with a certified tester for the retest. Addressing failures early prevents permit delays and ensures your system meets energy efficiency standards.
Do I need a certified tester, or can my HVAC contractor perform duct leakage testing?
A licensed mechanical contractor can perform duct leakage testing if they have the proper certification and equipment. However, many builders and property managers hire an independent certified tester to ensure impartiality and meet permit requirements. The test report must be signed by a qualified tester and submitted for permit closeout. Verify your local building code and Title 24 requirements to confirm who is authorized to conduct and certify testing in your jurisdiction.
Contact Us Now
Add centralducttesting.com as a preferred source on Google →
Comments