


What Happens After Duct Testing: A Complete Guide

Table of Contents
Understanding Your Duct Leakage Test Results
How Leakage Scores Are Calculated
Reading Your Test Report
What Happens If Duct Testing Fails
Common Failure Points and Why They Occur
Your Options After a Failed Test
How Long Duct Testing Takes and Timeline Expectations
Duct Repair and Sealing: What You Need to Know
Accessible Versus Inaccessible Leaks
Repair Sequencing and Cost Considerations
Duct Testing Documentation for Permits and Compliance
What Documentation You'll Receive
Title 24 Compliance and Building Code Standards
Post-Repair Testing and Verification
Your Checklist: Before, During, and After Testing
Frequently Asked Questions
Last Updated: October 16, 2026
Understanding Your Duct Leakage Test Results
Your duct testing report shows exactly how much conditioned air your ducts are losing. Understanding these results is the first step toward deciding what happens after duct testing.
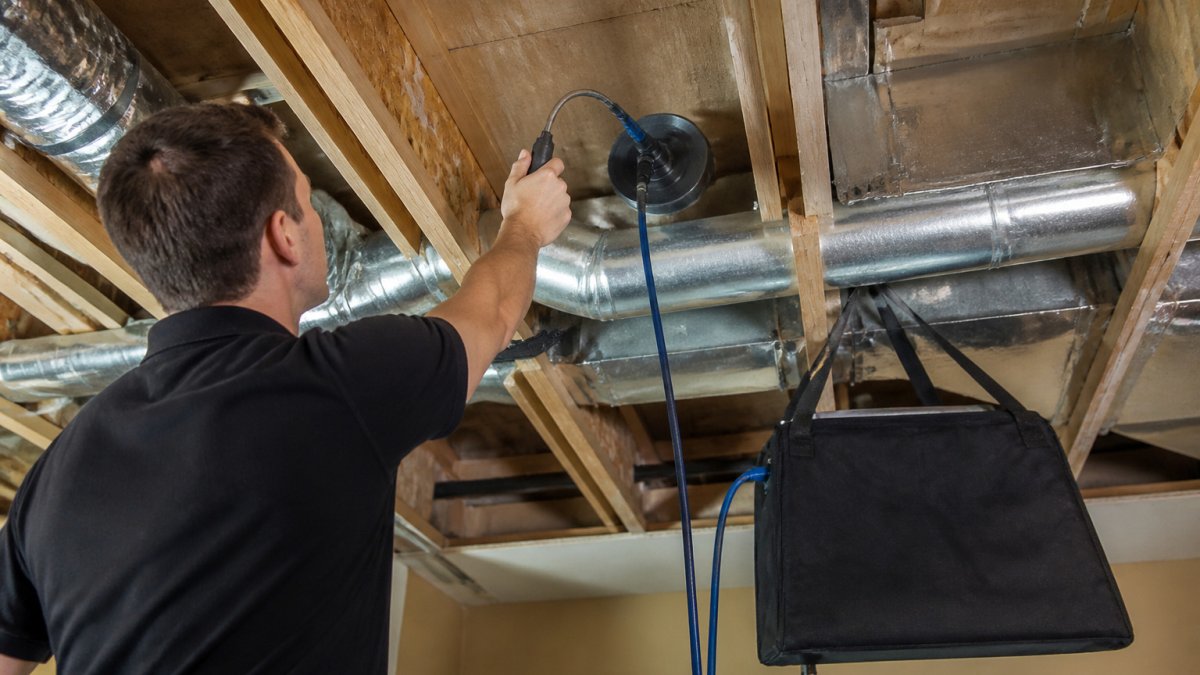
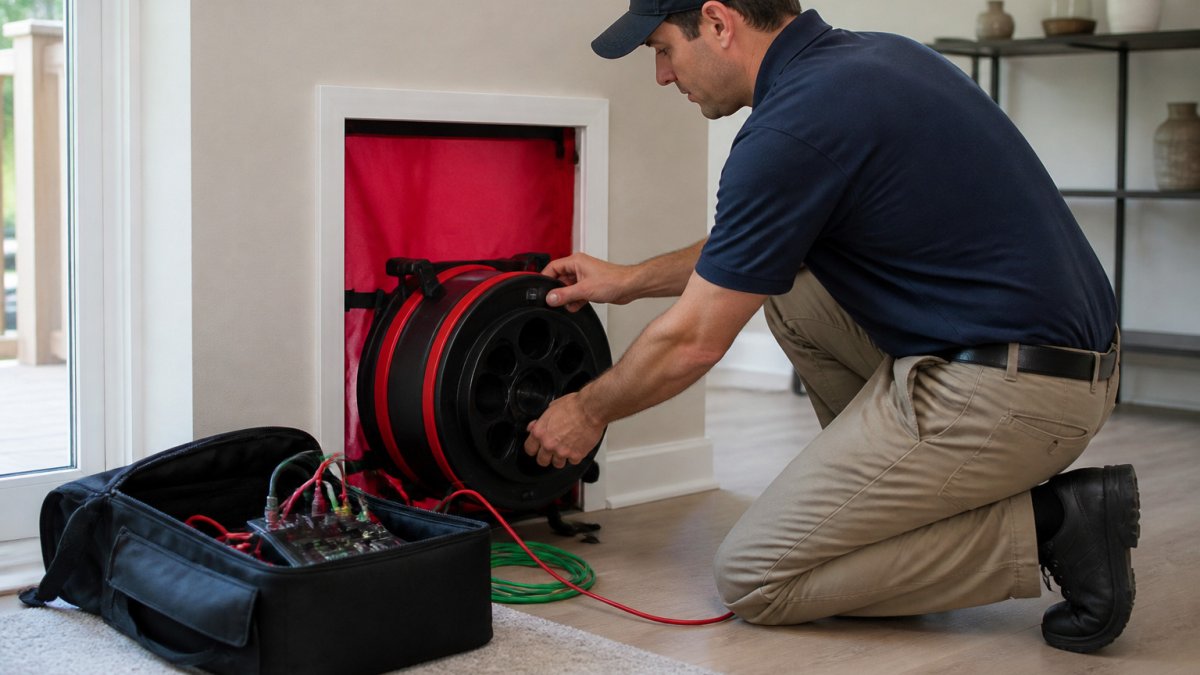
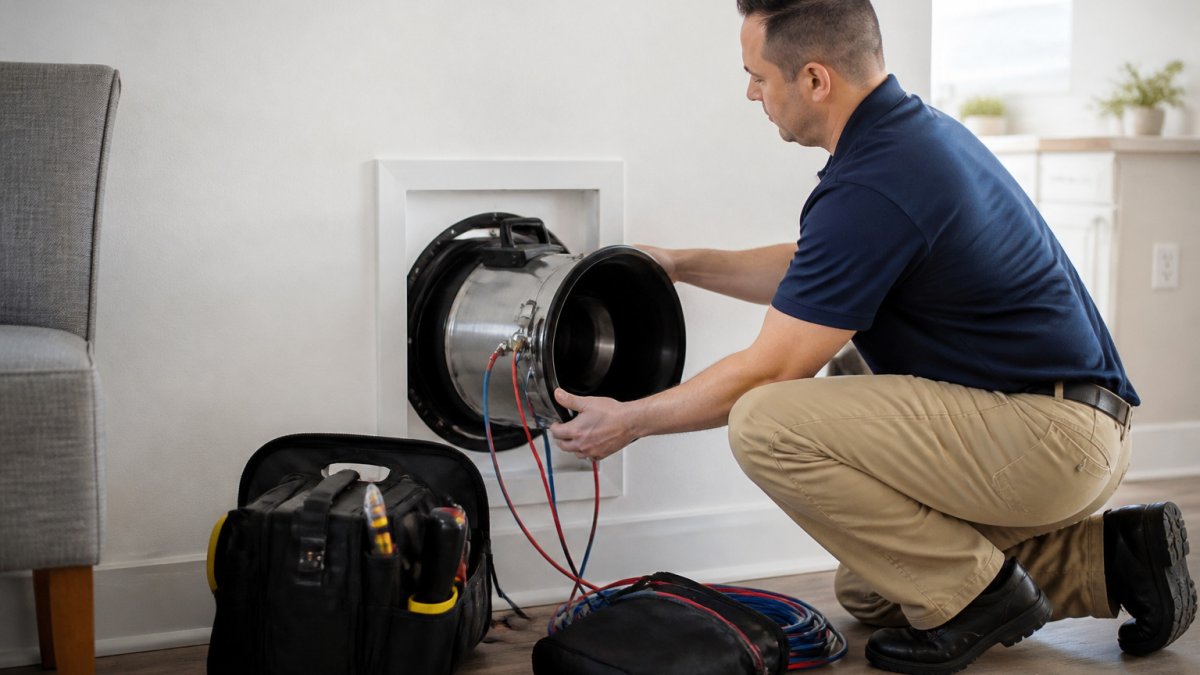
Duct leakage scores measure the percentage of air escaping from your supply and return ducts before it reaches your living spaces. A duct blaster pressurizes your ductwork to a standard test pressure, and a pressure gauge records how much air is needed to maintain it, the difference is the air leaking through joints, seams, and connections.
The report shows your leakage rate in cubic feet per minute (CFM) and as a percentage of total system airflow. One tells you the volume of lost air; the other whether that loss is acceptable under building code standards.
How Leakage Scores Are Calculated
Your technician applies a specific test pressure to the ductwork. At 25 pascals, the duct blaster fan runs at whatever speed is needed to maintain that pressure, and a gauge records the flow rate required.
That flow rate is your leakage measurement in CFM. The technician compares it to your system's total design airflow to calculate a percentage: a system designed to deliver 3,000 CFM that leaks 150 CFM has a 5% leakage rate.
Building codes set acceptable thresholds. Title 24 in California, for example, typically allows no more than 8% leakage for ducts inside the conditioned space, or 15% for ducts in attics, crawlspaces, or unconditioned areas.
Reading Your Test Report
Your test report should clearly state your ductwork's leakage rate and whether it passes or fails the applicable standard. Look for these key sections:
System identification, which HVAC system was tested
Test conditions, the test pressure used (usually 25 pascals)
Leakage measurement, CFM and percentage
Pass/fail determination, does it meet Title 24 or local code requirements
Accessible leaks identified, specific locations where air is escaping
Repair recommendations, suggested fixes to improve performance
The report identifies accessible leaks the technician can reach to apply sealant, and may note inaccessible leaks that require major renovation to reach. A clear report is a roadmap: how much air you're losing, where it's escaping, and what needs fixing.
What Happens If Duct Testing Fails
Failing a duct leakage test isn't a catastrophe, it's a signal that your ductwork needs attention before permit closeout or before you can hit your energy efficiency goals. Many older or hastily installed systems fail initial testing, but most accessible leaks are fixable.
Common Failure Points and Why They Occur
Duct connections and joints are the most frequent failure points. Where two pieces of ductwork meet, a small gap can develop if the connection wasn't sealed properly.
Register and grille leaks happen when supply or return registers aren't sealed tightly to the ductwork, letting conditioned air escape into attics or crawlspaces.
Duct terminations at the air handler or furnace, and where ducts penetrate walls or ceilings, can leak if not sealed. Blocked openings from incomplete installations also cause failures, an abandoned or capped-off duct run may not be airtight.
Return duct leaks pull unconditioned, or contaminated, air from attics or crawlspaces into your system, reducing efficiency and compromising indoor air quality.
Your Options After a Failed Test
If your ductwork fails testing, review the technician's report to identify which leaks are accessible and which are not.
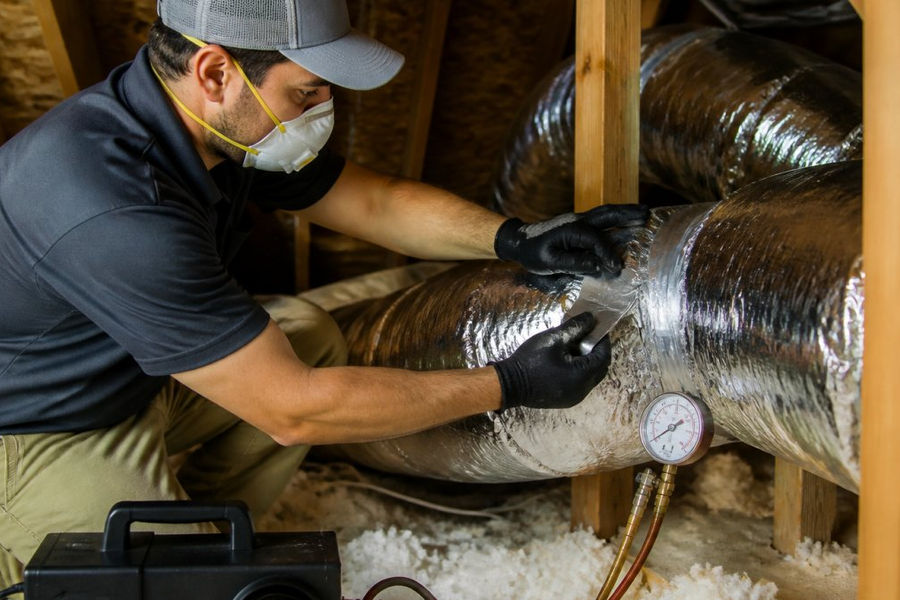
Accessible leaks can be sealed. Common sealants include mastic (a thick, putty-like substance) or metal-backed tape applied to joints and seams; flex duct connections need a proper clamp and mastic seal.
Request a repair plan and timeline. Ask your HVAC contractor or testing company for a written estimate and timeline, and whether repairs can be done before your next inspection.
Plan for post-repair testing. Most jurisdictions require a retest after repairs to verify leakage meets code, so budget time and cost for it.
How Long Duct Testing Takes and Timeline Expectations
A typical duct leakage test takes 1 to 3 hours, depending on system complexity and ductwork accessibility; a straightforward residential system usually takes 1.5 to 2 hours.
Preparation time varies: setup is quick with easily accessible, well-organized ducts, but longer in a cramped attic, crawlspace, or basement, or where ductwork is hidden.
Report turnaround is typically 24 to 48 hours; some companies give preliminary results on-site and a detailed written report within a day or two.
Post-repair testing follows the same timeline, allow another 1 to 3 hours for verification testing.
Timeline for permit closeout depends on your local building department.
Duct Repair and Sealing: What You Need to Know
After testing identifies leaks, repair decisions depend on where the leaks are and what they cost to fix, not all leaks or repairs are equally practical.
Accessible Versus Inaccessible Leaks
Accessible leaks are the priority. These are connections, joints, registers, and seams the technician can reach without major disruption. Sealing accessible leaks is straightforward and cost-effective.
Common accessible leak locations include:
Flex duct connections at the air handler
Duct joints in attics or crawlspaces
Register and grille connections
Duct terminations where ducts meet the furnace or air handler
Gaps around ducts where they penetrate walls or ceilings
These are sealed with mastic, metal-backed tape, or both. Mastic is generally more durable and is the preferred method for most sealing applications.
Inaccessible leaks are embedded in walls, buried under insulation, or otherwise unreachable, so sealing them means removing insulation or drywall, or accepting the leakage. Your three realistic options:
Accept the leakage if it's minor and your system still meets code thresholds
Reroute ducts around the problem area (expensive and time-consuming)
Replace duct sections (most expensive option)
Most homeowners and contractors seal all accessible leaks first, retest, then decide whether remaining inaccessible leaks need attention.
Repair Sequencing and Cost Considerations
Repair costs depend on the number of leaks, their location, and accessibility. Sealing accessible leaks delivers the most improvement per dollar, then retest to see if your system passes. Start there, accessible leaks deliver the most improvement per dollar, then retest to see if your system passes.
If you still don't meet code after sealing accessible leaks, evaluate the inaccessible ones based on how much additional leakage they represent, the cost to access and seal them, whether your code allows a threshold, and your energy efficiency goals.
Duct Testing Documentation for Permits and Compliance
Your duct testing report is a critical compliance document proving to your building inspector that your ductwork meets energy efficiency standards and is ready for permit closeout.
What Documentation You'll Receive
Your technician will provide:
Test report, showing leakage measurements, pass/fail status, and code compliance
System identification, which HVAC system was tested
Leak location map or description, where accessible leaks were found
Repair recommendations, specific fixes needed
Technician certification, proof that a qualified professional performed the test
Test date and conditions, when and how the test was performed
Keep this documentation, your inspector needs it for permit closeout, and if repairs are made you'll also need post-repair test results showing leakage meets code.
Some jurisdictions require the report to be submitted by a certified HERS rater or energy auditor. Central Duct Testing provides certified documentation that meets these requirements, ensuring your paperwork is accepted by your local building department.
Title 24 Compliance and Building Code Standards
Title 24 is California's building energy efficiency standard, setting mandatory requirements for HVAC ductwork in new construction and major renovations. Ducts inside the conditioned space may leak no more than 8%; ducts in unconditioned spaces (attics, crawlspaces) are limited to 15%. These thresholds are measured at 25 pascals using the duct blaster method, and your report will show whether you meet them. Other jurisdictions have similar standards, some identical, some their own, so check your local building code.
Documentation is everything for permit approval: a test report from a certified professional showing your ductwork meets code is what your inspector needs to sign off. Without it, your permit cannot close and your project stalls.
Post-Repair Testing and Verification
After repairs, a second duct leakage test verifies your ductwork meets code, the step that allows your permit to close. It follows the same process: the technician sets up the duct blaster, pressurizes to 25 pascals, measures leakage, and compares the new rate to code thresholds.
If it passes, your technician issues a new compliance report for your building inspector and your permit can close. If it still fails, identify why, repairs weren't completed as recommended, new leaks surfaced, inaccessible leaks remain, or the repair method wasn't effective, and work with your contractor on a second round, which resolves most cases.
Schedule post-repair testing within a few days of repair completion to keep your project moving and avoid permit closeout delays.
Your Checklist: Before, During, and After Testing
Use this checklist to stay organized throughout the duct testing process:
Before Testing:
Schedule your duct testing appointment with a certified professional
Ensure HVAC system is installed and accessible for testing
Clear access to attic, crawlspace, or mechanical room where ducts are located
Confirm that all ductwork connections are complete (no loose or abandoned sections)
Ask the technician what to expect and how long testing will take
During Testing:
Allow the technician full access to all ductwork areas
Ask questions about what the technician is measuring and why
Request identification of accessible leaks as they're found
Take notes or photos of leak locations for your records
Ask for a preliminary leakage rate before the technician leaves
After Testing:
Review the test report carefully and understand your leakage score
Identify which leaks are accessible and which are not
Get a written repair estimate from your HVAC contractor
Schedule repairs within 1-2 weeks of testing
Plan post-repair testing for a few days after repairs are complete
Submit your test report to your building inspector for permit closeout
Keep all documentation (initial test, repair records, post-repair test) for your files
Duct testing is a critical step in ensuring your HVAC system performs efficiently and meets code. If you pass, you're ready for permit closeout; if repairs are needed, addressing accessible leaks first is the most cost-effective path.
At Central Duct Testing, we provide certified duct leakage testing and comprehensive documentation that meets Title 24 compliance requirements. Our team identifies leaks, explains your results, and helps you understand your repair options. We also offer post-repair verification testing to confirm your system meets code. Contact Central Duct Testing today to schedule your duct leakage test and take control of your HVAC system's performance and energy efficiency.
Frequently Asked Questions
What happens after an HVAC duct leakage test?
After testing, you receive a detailed report showing your duct leakage score, air loss measurements, and identified leak locations. The report indicates whether your system passes or fails applicable standards. If you fail, the technician provides repair recommendations prioritized by severity. You then decide whether to repair immediately, schedule repairs later, or request post-repair testing to verify fixes. For permit closeout, your documentation goes to the building inspector or permit authority.
How do I know if my duct test passed?
Your duct leakage test passes when air loss falls within the allowable threshold set by Title 24 or your local building code. The test report clearly states pass or fail status. Pass thresholds typically depend on ductwork location (conditioned versus unconditioned space) and system type. Your technician explains the specific standard your project must meet and whether your results comply.
Do ducts need to be retested after repairs?
Yes, post-repair testing is required to verify that sealed leaks have been successfully fixed and that your system now meets code standards. Retesting typically occurs after all recommended repairs are complete. The second test confirms your ductwork achieves the required leakage score for permit approval and ensures your HVAC system performs as designed, maintaining energy efficiency and consistent comfort.
How much does duct testing and repair typically cost?
Testing and repair costs depend on system size, ductwork accessibility, number of leaks found, and repair complexity. For accurate pricing tailored to your specific project, contact us directly for a quote. We work with contractors and homeowners of all project sizes and can discuss budget options and repair prioritization to fit your timeline and contingency.
Contact Us Now
Comments